
感谢
宝藏大佬博客,解决一系列latex微小问题「博客向这位学习」
特别感谢各位的博客以及视频分享,感谢分享精神,我认为免费开源,分享学习是互联网的最大优点,也是最能推进学习进程的动力。
简介
LaTeX 是一种语言,CTex是一个集合了语言,编译工具的包,可以理解为Anaconda,现在已经比较老了,不建议安装。最新Latex版本为TexLive(win) mactex(macOS) 。
使用理由:
- 专注对口,不同期刊会议有不同的要求,latex切换更加方便。
- latex公式支持,不再局限于数学公式软件,操作繁杂且令人厌恶。
- 自动公式编号,高效文献引用。
- 代码书写思维,高效快捷。
- 不会卡,不会死机,占用资源底,不会丢。
- 跨平台编译,不受系统限制,也不会因为word版本不同显示乱码。
编辑器
Vscode
- 免费开源,微软大厂出品
- 简单小巧,运行速度快
- 高活跃社区,用的人越多,约好用。出现问题也好解决。
Texstudio
- Latex专业编辑软件。
- 设置更专业,界面化。
- 报错,界面更加友好。
配置
Vscode安装扩展,latex workshop
创建新的.tex文件,会自动出现TEX扩展。
就可以开始写了。写完之后,TEX扩展里面由View LatexPDF 可以编译预览。
- 基本设置
需要XeLatex ,但是原装扩展没有,需要自己加。
找到settings搜索latex,在json配置文件中用这段代码替换
{
    "latex-workshop.view.pdf.viewer": "external",
	"latex-workshop.view.pdf.external.viewer.command": "E:/soft/SumatraPDF/SumatraPDF.exe",  //绝对路径
    "latex-workshop.view.pdf.external.viewer.args": [
            "--unique",
            "%PDF%"
    ],
    "editor.minimap.enabled": true,
    "latex-workshop.latex.tools": [
        {
            "name": "xelatex",
            "command": "xelatex",
            "args": [
                "-synctex=1",
                "-interaction=nonstopmode",
                "-file-line-error",
                "%DOC%"
            ]
        },
        {
            "name": "xelatex-with-shell-escape",
            "command": "xelatex",
            "args": [
                "--shell-escape",
                "-synctex=1",
                "-interaction=nonstopmode",
                "-file-line-error",
                "%DOC%"
            ]
        },
        {
            "name": "xelatex-latexmk",
            "command": "latexmk",
            "args": [
                "-synctex=1",
                "-interaction=nonstopmode",
                "-file-line-error",
                "-xelatex",
                "-outdir=%OUTDIR%",
                "%DOC%"
            ]
        },
        {
            "name": "xelatex-latexmk-with-shell-escape",
            "command": "latexmk",
            "args": [
                "--shell-escape",
                "-synctex=1",
                "-interaction=nonstopmode",
                "-file-line-error",
                "-xelatex",
                "-outdir=%OUTDIR%",
                "%DOC%"
            ]
        },
        {
            "name": "pdflatex",
            "command": "pdflatex",
            "args": [
                "-synctex=1",
                "-interaction=nonstopmode",
                "-file-line-error",
                "%DOC%"
            ]
        },
        {
            "name": "pdflatex-with-shell-escape",
            "command": "pdflatex",
            "args": [
                "--shell-escape",
                "-synctex=1",
                "-interaction=nonstopmode",
                "-file-line-error",
                "%DOC%"
            ]
        },
        {
            "name": "pdflatex-latexmk",
            "command": "latexmk",
            "args": [
                "-synctex=1",
                "-interaction=nonstopmode",
                "-file-line-error",
                "-pdf",
                "-outdir=%OUTDIR%",
                "%DOC%"
            ]
        },
        {
            "name": "pdflatex-latexmk-with-shell-escape",
            "command": "latexmk",
            "args": [
                "--shell-escape",
                "-synctex=1",
                "-interaction=nonstopmode",
                "-file-line-error",
                "-pdf",
                "-outdir=%OUTDIR%",
                "%DOC%"
            ]
        },
        {
            "name": "latexmk",
            "command": "latexmk",
            "args": [
                "-synctex=1",
                "-interaction=nonstopmode",
                "-file-line-error",
                "-pdf",
                "%DOC%"
            ]
        },
        {
            "name": "bibtex",
            "command": "bibtex",
            "args": [
                "%DOCFILE%"
            ]
        },
    ],
    "latex-workshop.latex.recipes": [
        {
            "name": "PDFLaTeX",
            "tools": [
                "pdflatex"
            ]
        },
        {
            "name": "PDFLaTeX with Shell Escape",
            "tools": [
                "pdflatex-with-shell-escape"
            ]
        },
        {
            "name": "PDFLaTeX Auto",
            "tools": [
                "pdflatex-latexmk"
            ]
        },
        {
            "name": "PDFLaTeX Auto with Shell Escape",
            "tools": [
                "pdflatex-latexmk-with-shell-escape"
            ]
        },
        {
            "name": "XeLaTeX",
            "tools": [
                "xelatex"
            ]
        },
        {
            "name": "XeLaTeX with Shell Escape",
            "tools": [
                "xelatex-with-shell-escape"
            ]
        },
        {
            "name": "XeLaTeX Auto",
            "tools": [
                "xelatex-latexmk"
            ]
        },
        {
            "name": "XeLaTeX Auto with Shell Escape",
            "tools": [
                "xelatex-latexmk-with-shell-escape"
            ]
        },
        {
            "name": "PDFLaTeX -> BibTeX -> PDFLaTeX*2",
            "tools": [
                "pdflatex",
                "bibtex",
                "pdflatex",
                "pdflatex"
            ]
        },
        {
            "name": "XeLaTeX -> BibTeX -> XeLaTeX*2",
            "tools": [
                "xelatex",
                "bibtex",
                "xelatex",
                "xelatex"
            ]
        },
        {
            "name": "latexmk",
            "tools": [
                "latexmk"
            ]
        },
        {
            "name": "BibTeX",
            "tools": [
                "bibtex"
            ]
        },
    ],
}
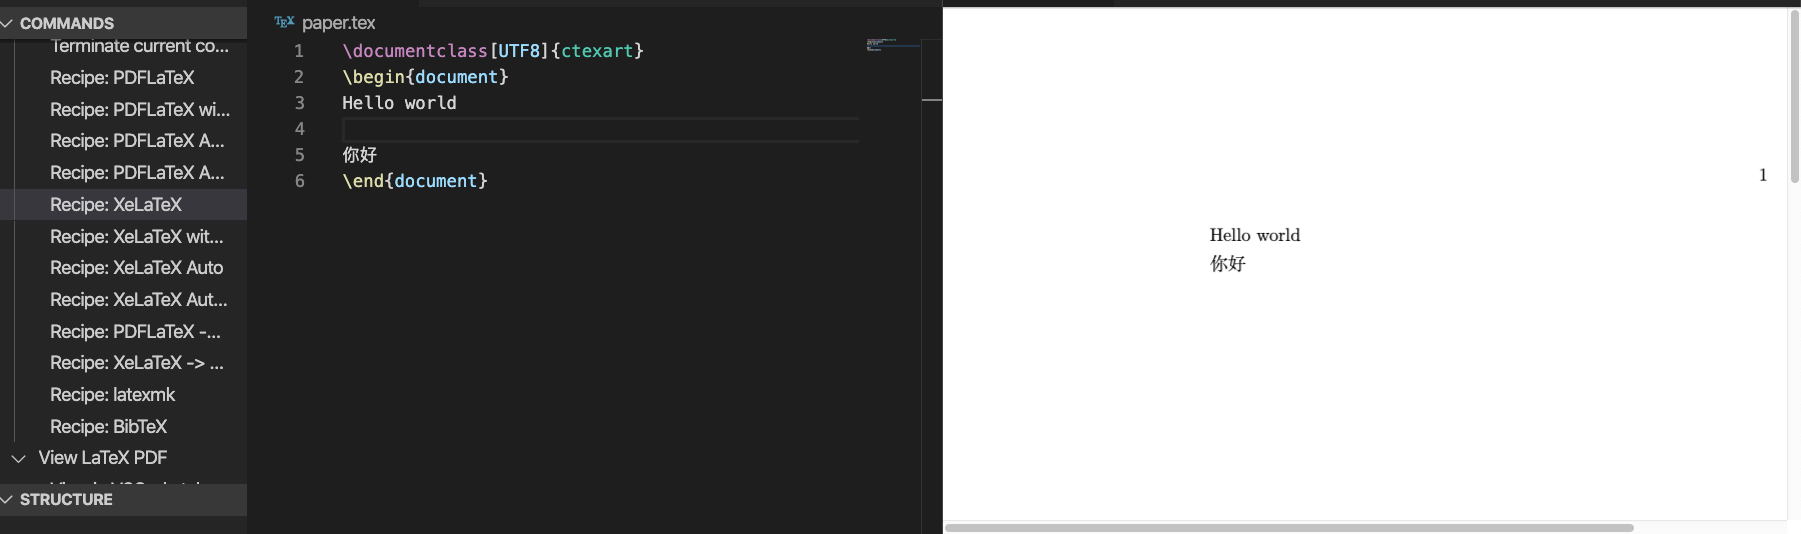
之后只需要在代码类定义中文包,用xelatex 编译就可以显示中文了
\documentclass[UTF8]{ctexart}
\begin{document}
Hello world
你好
\end{document}
表格支持
浏览器搜索 latex table online ,用Excel编辑好,然后放入网站自动生成比较好。
要不然表格敲代码太麻烦了。
引用参考文献
新建bib文件,将bibtex放入到文件,在tex文件中引用。
注意:当你更改了tex文档的时候,需要先进行编译,然后才能预览,否则内容还是修改之前的内容
\bibliography{ref} % 导入lib,ref为“ref.lib"的文件名
\bibliographystyle{ieeetr} % 参考文献排版风格,这个是IEEE transaction的,其他可以自查
中文
打开字体册,把这些常用字体都下载下来,记录字体名称,设置对应位置即可。
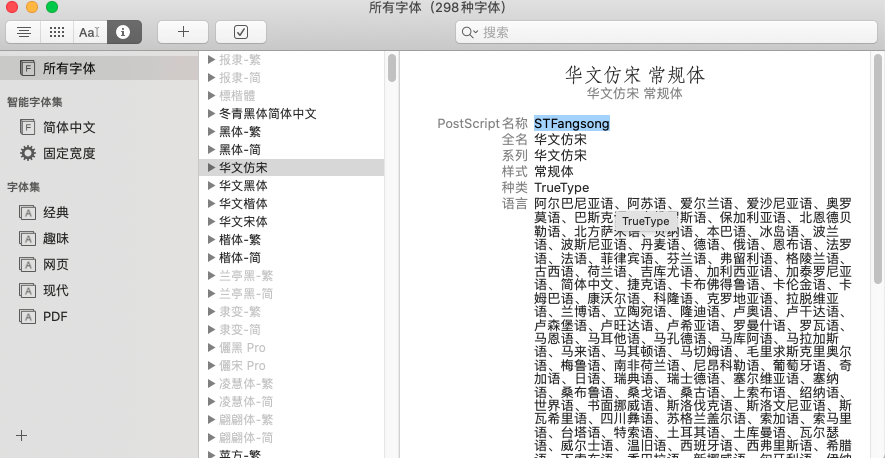
.tex头部引入如下代码,用XeLatex编译,注意文件编码要为UTF-8,先启用ctex环境。
\setCJKmainfont[BoldFont=STFangsong, ItalicFont=STFangsong]{STSong}
\setCJKsansfont[BoldFont=STFangsong]{STXihei}
\setCJKmonofont{STFangsong}
模版使用
模版下载可以浏览器搜索overleaf,或者搜索投稿论文对应期刊会议网站,一般会提供latex模版。
图片
\begin{figure}[ht]
	\centering
	\includegraphics[scale=0.4]{fig/net.png}
	\caption{Neural Network Structure }
	\label{fig2}
\end{figure}
表格
\begin{table}[ht]
	\caption{Summary of Databse}
	\centering
	\begin{tabular}{cccccc}
		\hline
		\textbf{No.} & \textbf{Latitude} & \textbf{Longitude} & \textbf{Data\_ceration} & \textbf{date\_update} & \textbf{Data volume} \\ \hline
		2902748      & 147.8             & 34.0               & 20180914                & 20200108              & 206                  \\
		2902750      & 135.8             & 29.8               & 20180910                & 20190529              & 228                  \\
		2902753      & 129.5             & 18.2               & 20190330                & 20200127              & 123                  \\
		2902754      & 146.5             & 29.9               & 20180901                & 20200221              & 121                  \\
		2902755      & 146.6             & 39.1               & 20180904                & 20200201              & 210                  \\
		2902756      & 137.9             & 20.5               & 20190326                & 20200107              & 123                  \\
		2903213      & 165.0             & 28.0               & 20181102                & 20181102              & 4                    \\
		2903329      & 142.5             & 33.3               & 20181102                & 20181102              & 82                   \\
		2903330      & 142.5             & 33.3               & 20181102                & 20181102              & 82                   \\
		2903394      & 144.2             & 32.3               & 20190822                & 20200217              & 64                   \\
		2903395      & 160.0             & 47.0               & 20190822                & 20200217              & 64                   \\ \hline
	\end{tabular}
\end{table}
公式
\begin{equation}
\text {net}^{[k]}=\sum_{i=1}^{n} \omega_{i }^{[k]} x_{i}+\alpha^{[k]}
\end{equation}